
Knowledge base · reading time 10 min
Assembling a mobile scaffold: step-by-step
Assembling a mobile scaffold is not complicated work, but the order matters. A careless start at ground level shows up four metres higher. This guide walks through the complete assembly, from unpacking the components to the final check before you climb, including the points where people commonly run into trouble.
- Assembling a mobile scaffold yourself? Full step-by-step guide: ground, brakes, frames, braces, platforms, guardrails, toe boards and stabilisers.
- No, you assemble the scaffold yourself.
- No, every connection is a click fitting you close by hand.
- At low heights that works, but with two people it goes considerably faster and more safely.
What you unpack before you start
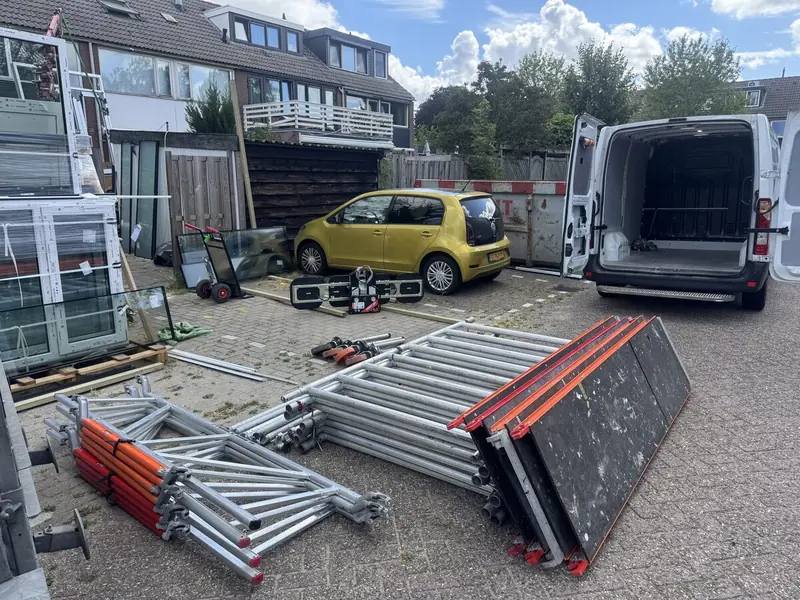
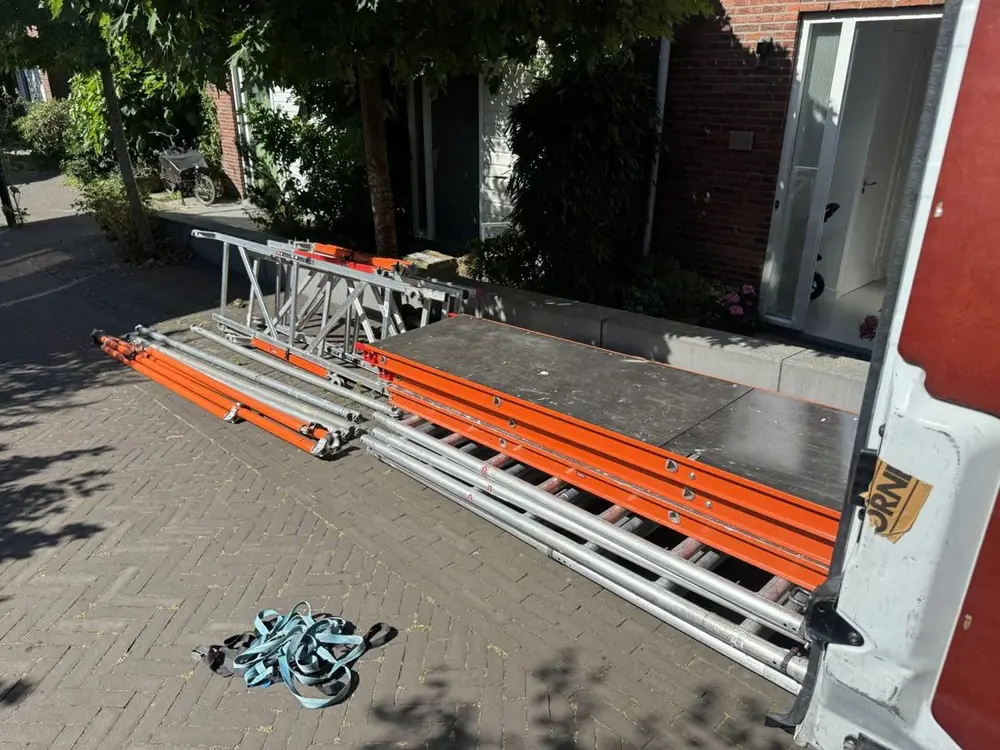
A complete mobile scaffold arrives in separate components, bundled by type. You get frames with a built-in climbing ladder, platforms with and without a hatch, diagonal braces, horizontal braces, guardrails, toe boards and a set of castors with brakes. Sort everything by type next to the spot where the scaffold will stand. That saves searching through half-built stacks later, and you immediately see whether anything is missing.
No tools are required. Every connection on our Altrex mobile scaffolds is a click fitting you close by hand. A manual comes with the scaffold and an instruction video is available, so you can follow the assembly order while you work. What does help: work gloves, a spirit level and a second person to take components from you at height, which saves climbing up and down.
Check the components before you stand the first frames upright. A missing brace is far better spotted on the ground than halfway up, because without it you cannot finish the bay above. Count the frames per height and the braces per bay and you know straight away whether the set is right. If you want to know what a full set contains, the hire checklist lists what to look for.
- Frames with a built-in ladder, in matching pairs
- Platforms with a hatch for climbing through, plus solid platforms alongside
- Diagonal braces, recognisable by their longer, angled length
- Horizontal braces that tie the frames together
- Guardrails and toe boards for all four sides of the working level
- Castors with brakes and an adjustable spindle
- Stabilisers or outriggers for the greater heights
Key facts
| Feature | Value |
|---|---|
| Core answer | Assembly takes 15 to 45 minutes; always follow the Altrex assembly scheme |
| Assembly time | 15 to 45 minutes, no tools needed |
| Castors | Swivel castors with brakes, locked while in use |
| Standard | EN 1004 |
| Load class | Class 3: 200 kg per m² |
Judging the ground before you start
The whole scaffold stands on four castors, and everything you and your materials weigh travels into the ground through those four points. The platforms are built to EN 1004 in load class 3, which is 200 kg per square metre, and the ground has to carry that. Concrete, paving slabs and solid brickwork are fine. Fresh sand, wet clay or a gravel path let the castors sink as soon as you start working.
Look at what lies underneath as well. Manhole covers, gullies, cellar hatches and newly laid paving handle point loads badly. If there is nothing solid, use sole boards or steel plates to spread the load. On a sloping terrace or a driveway with a fall you need more travel in the spindles, and sometimes a spot one metre further along is simply better. More on this in a mobile scaffold on uneven ground.
Finally, measure the space around the scaffold. The stabilisers angle outwards and need floor space on all four sides. A scaffold that fits exactly between the hedge and the wall, with no room for the stabilisers, does not actually fit. Look up as well, at roof edges, canopies and overhead cables, before you start stacking. A scaffold that runs into a projecting gutter halfway up has to come all the way down again.
Setting out the base and levelling it
Start with the castors. Slide the spindles into the bottom frames, fit the castors and lock the brakes straight away, even with nothing on top yet. A base that starts rolling while you clip a brace in place is the quickest way to drop a frame on your foot. Then stand the first two frames upright and tie them together with the horizontal braces into a stable square.
Now level it. Rest the spirit level on the bottom rail and correct with the spindles, first along the length of the scaffold and then across it. Check both directions again, because adjusting one side usually pulls the other out. All four castors must still touch the ground afterwards; a castor hanging free means the load is running through three points instead of four.
Take your time here. A centimetre out of level at the base becomes a serious lean at twelve metres of working height, and you cannot correct it later without dismantling. Check the level again once the scaffold is at full height as well, because the spindles settle a fraction under load. The guide to stabilising and tying a scaffold covers what to do when the surface will not cooperate.
Stacking frames and fitting the braces
From the levelled base you build upwards in bays. Set two frames at a time on the previous pair, push them fully onto the spigots and then clip the horizontal and diagonal braces in place. The diagonal brace is what gives the scaffold its stiffness: without it the frame can rack in its own plane. Skipping one is not a shortcut, it is a structural fault.
Work from the platform below you, never from the outside. You lay the platform at the level you are standing on, climb through the hatch and lift the next frames into position from there. That keeps you inside the footprint of the scaffold during every movement, which is exactly what the EN 1004 standard is built around, and it is also the quickest way to work.
Check every click fitting per bay. A brace that is only hooked on and not locked will release as soon as the scaffold is pushed sideways once. The sound of the catch closing and a short tug on the end are the two fastest checks you have. Do it bay by bay rather than once the whole scaffold stands, otherwise you walk the entire structure a second time.
Laying the platforms and using the hatches
Platforms rest on the frame rungs and lock down with the hooks underneath. On the RS51 and RS52 the platform is 245 cm long, so each level gives you a generous working deck. On every level you climb through, use a platform with a hatch. Fill the rest of the level with solid platforms so you are not left with open gaps.
Close the hatch as soon as you are through it. An open hatch is a hole in your working deck at precisely the spot where you step backwards with a roller in your hand. It should stay closed when you leave the scaffold too, if only because wind can slam an open hatch shut hard. If it slams while somebody is halfway through it, you have an accident rather than a near miss.
If you plan to work at several heights, leave the intermediate platforms in place. They cost you nothing in assembly time, they stiffen the structure and they give you somewhere to rest tools on the way up. When you dismantle you take them out in reverse order, so they cost you nothing at the end either. One extra platform level is almost always worth having.
Guardrails and toe boards at the working level
Before you stand on the working level, fit the double guardrail all the way round: a knee rail and a top rail on all four sides. The wall side is the one people skip because the facade looks close, but the gap between scaffold and wall is exactly where you can drop through. Fit the guardrails before you hoist materials up rather than afterwards, otherwise you end up on an open platform with both hands full.
The toe boards go in next, around the full platform level. They are not there to stop you but to stop your tools, screws and paint tins. A brush falling ten metres is everybody's problem at ground level. They also stop your own foot sliding off the edge as you step back to look at your work. More on how that edge protection works is in fall protection on a mobile scaffold.
If you work at more than one level, every level you stand on gets the same treatment. An intermediate platform without guardrails is fine to step across, but not to work from. If you end up standing on one to sand or fill for any length of time, fit the rails around it first. It takes two minutes and settles the question of whether it is allowed.
Setting the stabilisers and outriggers
Stabilisers are the angled supports that widen the base of the scaffold. The higher you build, the more they matter, and above a certain height you simply do not build on without them. They are supplied with the scaffold and clamp onto the bottom frames, after which you wind the spindle down until it genuinely carries. Fit them as soon as you start the second bay rather than leaving them until the scaffold is at height.
All four stabilisers should sit at the same angle and all four should make contact. One hovering just above the paving does nothing, and one wound down too far lifts a castor. Walk round them again once the top frames are on, because the scaffold settles slightly as you build. The rules on how high you can build are covered in how high a mobile scaffold may go.
- Clamp all four stabilisers at the same height on the bottom frame
- Set them out at the same angle so the base is symmetrical
- Wind each spindle down until it carries, without lifting a castor
- Keep the swing area clear of hedges, cars and skips
- Check them again once the scaffold is at full height
- Raise them before you move the scaffold
Working height, platform height and the number of levels
While assembling you think in platform heights, not working heights. Working height is the platform height plus two metres, the reach of an adult standing on that platform. To reach a gutter at six metres you build the platform at four metres, not at six. That saves a complete bay of frames and braces. Work backwards from the job to the platform height you actually need.
The range runs from 4.2 to 14.2 metres of working height, from a low job in the garden to a facade several storeys up. If you are not sure which height you need, the overview on the working height page helps. Never build higher than the height you hired, and never add a step stool or an upturned bucket on the platform to gain the last bit of reach.
The table below sets working height against platform height, with the models that cover each height. The MiTower is the one-person scaffold and reaches up to six metres of working height. Above that you are looking at the RS51 at 75 cm wide or the RS52 at 135 cm wide, both with a platform length of 245 cm and both reaching the upper heights of the range.
| Working height | Platform height | Models |
|---|---|---|
| 4.2 metres | 2.2 metres | MiTower, RS51, RS52 |
| 6 metres | 4 metres | MiTower, RS51, RS52 |
| 8 metres | 6 metres | RS51, RS52 |
| 10 metres | 8 metres | RS51, RS52 |
| 12 metres | 10 metres | RS51, RS52 |
| 14.2 metres | 12.2 metres | RS51, RS52 |
The final check before you climb
With the scaffold standing, walk right around it once and look from the ground upwards. You are looking for three things: fittings that are not locked, missing braces and platforms that are not secured. Do it calmly, because this is the last time you can see everything from ground level. Start at the castors and work your eyes upwards, bay by bay, to the working level.
Then push your shoulder against a frame at chest height. A properly assembled scaffold barely gives. If you feel a clear movement, a diagonal is missing somewhere or a click fitting is not closed. Repeat the push test on both sides, because a missing diagonal only shows in one direction. The wider rules on checking before use are set out in the rules for working safely at height.
- All four castors are braked and touching the ground
- The scaffold is level in both directions
- Every bay has its diagonal brace and all fittings are locked
- Platforms are secured and the hatches close
- Guardrails and toe boards run right around the working level
- The stabilisers are extended and all four are carrying
Climbing and working on the platform
Always climb up on the inside, using the ladders in the frames and the hatches. The outside of a mobile scaffold is not a ladder: the rungs are too far apart and your weight pulls the scaffold towards you. Climb with both hands free and hoist tools separately, on a rope or in a bucket. You do not climb a scaffold with a drill in one hand.
Stay on the platform inside the guardrails. Overreaching to the side is the most common reason a scaffold tips, and it gains you half a metre at best. Move the scaffold one extra time along the facade instead. Standing on a guardrail or an upturned bucket to gain that last bit of height is never worth it, not even for a ten-second job.
Mind the loading. Load class 3 means 200 kg per square metre, spread across the platform. Two people with tools fit comfortably; a stack of roof tiles on half a square metre is a different matter. Spread materials along the length of the platform rather than piling them in one spot, and put the heaviest items over a frame rather than in the middle of a span.
Moving, dismantling and returning the scaffold
Move it empty. Take tools and materials off the platforms, let nobody stay on the scaffold, raise the stabilisers and release the brakes. Push from the bottom, not the top, and roll slowly along a level line. Once it is in its new position: brakes on, stabilisers back out, level checked. Never roll over a threshold or a kerb with the scaffold at full height.
Dismantling runs in reverse: toe boards and guardrails first, then the platforms, then the braces and the frames. Work downwards from the platform below you here too, and throw nothing down. Lay the components out by type again and packing up takes care of itself. The full method is in dismantling and returning a mobile scaffold, including the order level by level.
Return the scaffold complete and undamaged, or have it ready for the driver who collects it. Once everything is back, the deposit is returned within one working day. On delivery the deposit is 500 euro for the RS51, the RS52 and the MiTower, and 150 euro for the room scaffold. What you pay per model is set out on the deposit page.
Frequently asked questions
Does Steigertaxi assemble the scaffold for me?
No, you assemble the scaffold yourself. The scaffolds are delivered in components and are designed to click together without tools, with a manual and an instruction video included. If you get stuck during assembly, we talk you through it on WhatsApp.
Do I need tools to assemble a mobile scaffold?
No, every connection is a click fitting you close by hand. Work gloves and a spirit level for setting the base are useful, but no spanner or drill is involved anywhere in the assembly.
Can I assemble a mobile scaffold on my own?
At low heights that works, but with two people it goes considerably faster and more safely. The frames and platforms are manageable on their own; the issue is that someone has to take them at height while the other stands on the platform.
How long does assembly take?
That depends mainly on the height and on whether there are two of you. A low configuration stands much faster than a twelve-metre scaffold, where you stack several bays and reset the stabilisers along the way.
When is the scaffold delivered?
Order before 15:00 and the scaffold arrives the next working day, anywhere in the Netherlands. Delivery and collection are covered by a fixed amount per province. Collecting it yourself is free by appointment at Zeeburgerpad 89 in Amsterdam.
Does a mobile scaffold fit through a normal internal door?
For indoor work the RS44 room scaffold is the model to use, and it passes through a standard internal door from around 70 cm. The RS51 is 75 cm wide and clears most gates, but not every door frame. See the room scaffold for indoor jobs.
What do I do if a component is missing or damaged?
Stop building and report it straight away. A scaffold without its diagonal brace or with a damaged platform is not one to use. Get in touch through our contact page or send a WhatsApp message and we will sort it the same day.