
Knowledge base · reading time 13 min
A mobile scaffold on uneven ground
A garden path falls away, a slab has settled and the lawn is soft after rain. A mobile scaffold still stands safely on almost all of those surfaces, provided you work in the right order: assess the ground, lay base plates, set the adjustable feet and only then build higher. Below is what goes wrong on each surface and what to do about it.
- Mobile scaffold on paving, grass, sand or a slope? Level it with adjustable feet and base plates, and check it properly every single day.
- Yes, provided you level it with the adjustable feet and every foot carries load.
- None: you only build higher once the base frame is level in both directions.
- Loose bricks and stacked slabs are not suitable, because they can tip or crack under the point load.
Why one uneven foot matters most at the top
A mobile scaffold carries its entire weight through four feet. If one of them does not sit fully on the ground, the load spreads over three points and the frame starts to twist. You barely notice at the base, but every level multiplies the deviation, so a couple of millimetres of play at a foot becomes visible lean at the top. That is why every build starts with the ground and not with the first frame.
A scaffold that is out of level also feels different from how it looks. You often only notice when you walk to a corner of the platform and the structure gives slightly. That is exactly the moment people grab the facade to steady themselves, shifting the load further to one side. Make sure it is level before anyone climbs on, not afterwards.
The mobile scaffolds we hire out are Altrex equipment built to EN 1004, designed around four evenly loaded feet on a flat, load bearing surface. The standard covers the tower, not your pavement. Judging the ground therefore stays your call, and you make that call before you start assembling. So walk the spot first and decide where the four feet will stand before you take a single part out of the bundle.
Key facts
| Feature | Value |
|---|---|
| Core answer | Level the scaffold with the adjustable legs; soft ground needs load-spreading pads |
| Castors | Swivel castors with brakes, locked while in use |
| Standard | EN 1004 |
| Load class | Class 3: 200 kg per m² |
| Working height | Platform height + 2 metres |
Adjustable feet: what they solve and what they do not
Adjustable feet are the threaded feet under the base frame that let you wind out height differences. They are meant for the small variations you find everywhere: a slab that has settled, a fall towards the road, the lip of a driveway. Their range is limited, so they correct an unevenness rather than a step of half a stair tread. If you have to wind one right out, that is a sign the spot itself is wrong.
Always set them before you build higher. Put the base frame down, wind the four feet until the frame is level, and only then continue. Adjusting afterwards under an eight metre tower means putting the load of the whole structure onto one spindle while you turn it, which you want to avoid. The step by step assembly guide follows that order.
What adjustable feet do not do is add bearing capacity. A foot wound out on soft ground sinks exactly as fast as one wound in. Bearing capacity comes from surface area, so that means base plates or boards. The guide on scaffold loading and weight explains where the limits of the structure sit and where the limits of the ground begin.
The order in which you level the base
Levelling goes wrong when you correct one foot at a time and keep starting over. Work from low to high instead: find the highest corner of the ground, set that foot as low as it goes and bring the other three up to it. That keeps the tower as close to the ground as possible and uses the adjustment range only once. Then check in both directions, because a frame can be true lengthways and out across the width.
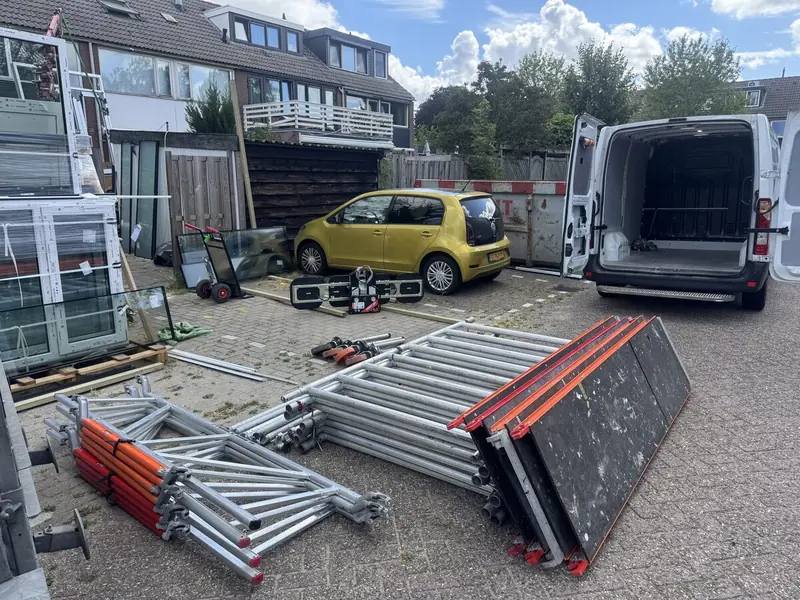
The practical order looks like this, and you keep to it on every set-up, even when the paving looks flat. Do not skip the first step in particular: sliding base plates under a standing tower is not possible without lifting the whole structure. Work through the six points below in this order. Have the spirit level to hand before you start, so you do not walk back to the van halfway through.
Put the spirit level on the first platform rather than on a brace or guardrail, since those can give slightly as they are hooked in. Repeat the measurement once the first platform level is in place, because the weight of the structure itself presses the feet a little further into the ground. On a soft surface that first settling is often the largest movement of the whole hire period.
- lay the base plates or boards first, where the feet will stand
- set the base frame down with all adjustable feet wound fully in
- find the highest corner and leave that foot as it is
- wind the other three up until the frame is level in both directions
- lock the castors and check that every foot really carries load
- measure again once the first platform is in
Paving, slabs and a pavement with a fall
Paving in a garden or on a drive is rarely flat. Bricks settle around a manhole, a pavement falls towards the gutter, and slabs near a downpipe often dish where water collects. Those are exactly the differences adjustable feet are made for, so in most cases you need nothing extra. Do check that each foot stands on a whole slab and not on the joint between two bricks.
A loose or cracked slab under a foot is deceptive, because it only tips once load comes onto it. Tap the slabs where the feet will go with your heel: a hollow sound means there is a void underneath. In that case lay a board across several slabs so the load is spread and a single loose stone no longer matters.
Pay attention to what sits below the paving as well. Above a crawl space, a basement light well, a manhole or a freshly backfilled cable trench, the bearing capacity differs from a metre away. Move the tower half a metre rather than take the risk, because no adjustable foot corrects for that. Moving a tower half a metre costs two minutes, while a foot sinking mid job costs you the rest of the day.
Grass, sand and freshly backfilled ground
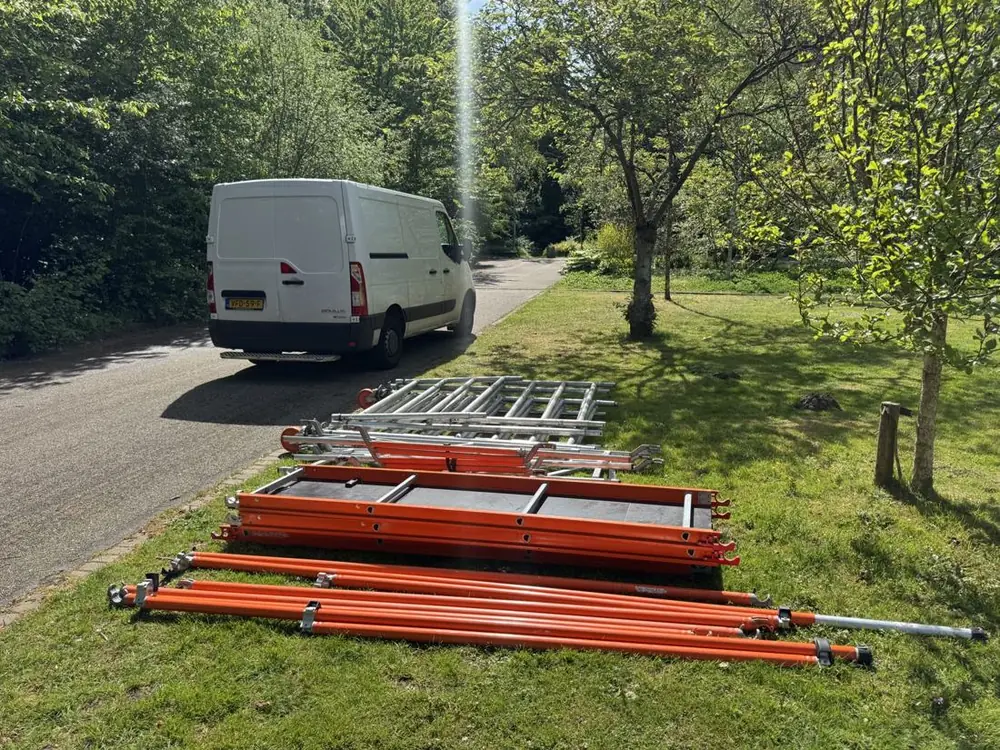
On grass, soil or sand a scaffold foot sinks as soon as weight comes onto it. The contact area under an adjustable foot is small, so the pressure per square centimetre is high. The answer is surface area: put base plates, track mats or sound timber boards under the feet so the load is carried across a wider area. Check again after half an hour of work to see whether everything is still level.
Do not confuse the platform load with the pressure on the ground. Our equipment is load class 3, which means 200 kilos per square metre on the platform, and that says nothing about what your lawn can take. Those are two separate questions and only the first one is covered by the standard the equipment is built to. Judge the ground separately from the equipment: how soft does it feel under your heel, and does a print stay behind when you rock on it?
Freshly backfilled ground, for example after a pipe was laid or a tree removed, is the trickiest category. It often settles further only after rain, so a tower that stood level on Monday can lean on Tuesday. Build no higher than you need there, check every morning, and use wide boards. A lower build on a wider frame is nearly always the better answer than a tall one on soft ground.
What belongs under the feet on each surface
What you put underneath depends on two things: how hard the surface is and how well it keeps that hardness when the weather turns. Concrete does not change, grass does. The table below lists the surfaces you meet in a garden, on a drive or at the kerb, with what goes wrong and what to do about it. Read the table as a starting point for your own site rather than as a rule, because two gardens with the same paving can behave completely differently.
Treat the last column as a habit rather than a one off. A check made during assembly covers the first few hours, but not a five day hire with a wet night in the middle. If your surface is not in the table, a quick conversation beforehand is faster than finding out on site. Tie the check to something you already do each morning, such as the first coffee or unloading tools from the van.
| Surface | Where it goes wrong | What goes underneath | Check |
|---|---|---|---|
| Concrete or asphalt | a crack or the rim of a manhole | nothing extra needed | every foot sits fully on the surface |
| Paving or slabs | loose stone, fall towards the gutter | board across several stones | tap the stones for a hollow sound |
| Grass or soil | feet sink under load | base plates or track mats | measure again after half an hour |
| Sand or grit | the foot twists away when moving | firm board, well bedded in | compact and re-level |
| Gravel | the top layer shifts under the foot | board bridging the loose layer | level the spot first |
| Freshly backfilled ground | settles further after rain | wide boards, build lower | measure again every morning |
| Decking or roof terrace | the structure does not carry everywhere | boards across several joists | ask the owner about capacity |
Working on a slope and on falling ground
On a slope, set the tower across the direction of the fall, with the long side following the contour. That keeps the difference you have to take out with the adjustable feet as small as possible, because you are bridging the narrow dimension of 75 or 135 centimetres rather than the 245 centimetre platform length. On a steep slope that is the difference between reaching level and not reaching it at all.
Limit the height as well. The higher you build on sloping ground, the greater the effect of any inaccuracy at the base. If the adjustable feet only just bring you level, build one level lower and use your reach instead, since working height is platform height plus two metres. The working height page shows which model belongs to which height.
Never move a tower on a slope with loose tools on the platform, and never with anyone on it. Wind the adjustable feet in before you roll, move along the contour rather than down the fall, and reset the feet afterwards. Take the extra minute: a tower repositioned without re-levelling is the most common way a good set-up turns into a bad one.
Stabilisers and anchoring when the ground is poor
Stabilisers widen the supporting base of the tower and belong on the structure from a certain build height. On uneven ground they need extra attention, because the foot of a stabiliser also has to carry. One that hovers just above the ground does nothing, and one pressed in too far pushes the tower out of level. Set them after the scaffold is level, not before.
Where the ground is genuinely unreliable, anchoring to the facade is often the better route than building higher on soft material. What applies when is set out in the guide on stabilising and anchoring. Always combine that with proper support under the feet, because an anchor does not replace bearing capacity at ground level. On a rented property, agree with the owner in advance where you may anchor, which saves an argument afterwards about holes in the facade.
Wind matters too. A tower standing on a smooth or loose surface shifts under sideways load sooner than one on concrete. Lock the castors, take off any sheeting before it gets windy, and dismantle if the job is on hold for a longer period. The rules for working at height go into this in more detail. A tower left standing over a weekend deserves the same look over on Monday morning as one you have just built.
Indoors, on a balcony and on a roof terrace
Indoors the surface is usually flat but rarely equally strong everywhere. A timber upper floor carries differently above a joist than between two joists, and a poured floor or parquet marks under a point load. So put boards or sheets under the feet indoors as well. Thresholds are the second point: they decide whether you roll straight through or have to lift the tower over.
For rooms and hallways the RS44 room scaffold is the practical model, because it passes through a standard interior door from around 70 centimetres, so you roll it rather than dismantle it. Take a look at the room scaffold. If you work alone, the MiTower is a good option: a one person tower reaching up to 6 metres working height.
On a balcony or roof terrace, tiles often sit on pedestals or on an insulation layer, which makes the surface flat but not automatically load bearing. Ask the building owner or association what the floor can take and spread the load with boards across several supports. The points to watch are gathered in the guide on a scaffold on a balcony or roof terrace.
The check you run before climbing
The final check takes a minute and prevents most of the problems that develop during a job. Run it while you are still on the ground, so before any tools go up onto the platform. Repeat it after every reposition and at the start of every working day, because ground that has had a night of rain is not the same ground it was yesterday.
This is the round you make, and it takes less time than unloading your tools. Walk it physically around the tower rather than looking from one fixed spot, because a hovering foot is only visible up close. The six points below cover everything to do with the ground. Carry the spirit level with you, because half of these points are checked with it in your hand.
If several people are working, agree who runs the check. In practice it goes wrong when everyone assumes someone else has already looked. The wider list covering the whole hire period is in the mobile scaffold hire checklist. Run it out loud if you do it together, because you hear straight away which point nobody actually checked. A named person and a fixed round beat two people glancing at the base on their way past.
- every adjustable foot sits fully on its plate or board
- the frame is level in both directions
- all castors are locked
- the stabilisers genuinely carry rather than hover
- nothing has changed since yesterday, such as rain or a dug trench
- nothing loose under the feet that could slide out
Delivery, self assembly and advice on site
Order before 15:00 and we deliver the next working day, anywhere in the Netherlands. Delivery and collection are covered by a fixed amount per province, so you know the figure in advance. What that means for your area is shown on the delivery costs page. Collecting the equipment yourself is free by appointment at Zeeburgerpad 89 in Amsterdam. We drop the equipment at the spot you give us when booking, so let us know whether it has to go round the back or can stand at the kerb.
We deliver the equipment in parts and do not assemble it for you. You build the scaffold yourself, using the manual and the instruction video supplied with your booking. On a difficult surface that is actually an advantage, because you decide on the spot where the feet go and how much you correct with the adjustable feet. Our driver can think along about the best position when dropping off.
The deposit on delivery is 500 euro for the RS51, the RS52 and the MiTower, and 150 euro for the room scaffold. If you collect yourself the deposit is 1000 euro for the RS51 and RS52, 750 euro for the MiTower and 150 euro for the room scaffold, returned within one working day after collection. More on that under the scaffold deposit. Unsure about your surface? Send a photo via WhatsApp or through the contact page.
Frequently asked questions
Can a mobile scaffold stand on uneven ground?
Yes, provided you level it with the adjustable feet and every foot carries load. The ground also has to take the weight without sinking, so on soft surfaces you lay boards. Check with a spirit level on the first platform and repeat that after half an hour of work.
How much lean is still acceptable?
None: you only build higher once the base frame is level in both directions. If the adjustable feet cannot get you there, move the tower or level the spot first. A small deviation at the base becomes a large one at the top.
Can I put a brick or a slab under an adjustable foot?
Loose bricks and stacked slabs are not suitable, because they can tip or crack under the point load. Use a firm, flat board or a proper base plate that spreads the weight over a larger area. A board across several pavers works better than something under a single foot.
Should I re-check the scaffold after rain?
Yes, especially on grass, sand or backfilled ground. Water softens the top layer, so feet sink further and the tower goes out of level. Walk round the four feet and re-measure before you climb that day.
What if one of the four feet barely touches the ground?
Wind that adjustable foot out until it carries properly, then measure again. A hovering foot means the load sits on three points and the structure is twisting. If it keeps happening, the spot itself is not flat enough and you should reposition the tower.
Can the scaffold stay up for several days?
Yes, and that is often the cheapest route, because every day after the first costs 5 percent of the day rate. Do check the adjustable feet and castors every morning. If strong wind is forecast, remove any sheeting and keep the build height down.
Which scaffold should I choose if the ground is genuinely poor?
Usually a lower build on a wider model, so the 135 centimetre RS52 rather than a tall narrow set-up. A wider base spreads the load over a larger area and is less sensitive to a local depression. Feel free to discuss your situation in advance.