
See your price
Application

Installing a camera? Choose the right scaffold.

Installing a camera looks like a half hour job until you have to aim it. The housing sits high because you want an overview, power or a signal cable has to reach it, and only on the screen do you find out whether the field of view is right. Almost everyone ends up going back up once more. If the mounting point sits at around four metres, you hire the MiTower, the narrowest tower we let out: 75 cm wide, built for one person, in a build that comes out at roughly five metres.

  • Order before 3 pm, delivered tomorrow
  • Professional Altrex scaffolds
  • Up to 14.2 metres working height
  • Easy to assemble yourself
4,2 tot 14,2 mWorking heights available
12Provinces served
7Days a week
200 kg/m²Load class 3
In short
  • For installing a camera we recommend the 1-person scaffold.
  • For a camera at four to five metres you hire the MiTower: 75 cm wide and built for one person.
  • Count on going up twice, first to mount and cable, later to turn the housing after you have seen the picture.
  • The tower carries one person, so whoever judges the image stays on the ground and walks the sight line.
  • First 24 hours from €100 incl. VAT and delivery; every day after that 95% off.
Key facts for this job
FeatureValue
Recommended scaffold1-person scaffold (Altrex Mi Tower)
Working height for this job4.2 to 5.2 metres
Available working heights4.2 to 14.2 metres
StandardEN 1004, load class 3 (200 kg per m²)
DeliveryOrdered before 3 pm, delivered next working day
Each extra day95% off, from €5 a day
Why a mobile scaffold for installing a camera?

Safe, stable and professional work at height

With a camera, the spot you hang it in decides what it sees, and that spot is by definition too high to reach from the ground. You fit the bracket, tuck the cable away, glance at your phone and find the frame takes in a little too much roof and not enough driveway. Correcting that means returning to the same point, with the same bracket and the same screwdriver. Hiring a scaffold for installing a camera therefore mostly means having one fixed set-up that stays put until the picture is right, rather than a ladder you reposition on every attempt. The bracket does not move, so the thing you stand on should not move either.

  • High for overview, low enough to recognise faces
  • Power or a signal cable has to go up
  • Working height 4.2 to 5.2 metres to the bracket
  • Two hire days, because aiming follows the mounting
Read more about working safely →

Hiring the MiTower for installing a camera: narrow and light

For a camera going onto a wall at four to five metres you hire the Altrex MiTower, a tower of 75 cm wide that is meant for a single user. Camera brackets rarely sit on an open stretch of brickwork. They go on a corner, above a door or beside a garage, and there is often barely a metre of room. Those 75 cm are then the difference between fitting and shuffling. What else the model copes with is set out on the page about hiring a MiTower.

The range of this model runs from 4.2 to 6.2 metres of working height, and for a camera you sit at the bottom of that range. That is exactly why it suits the job. You build only a couple of frames, you are up quickly, and you can wheel the tower along on your own. That counts for a lot here, because you go up and down several times per camera and you would rather not have to call in a second pair of hands for it.
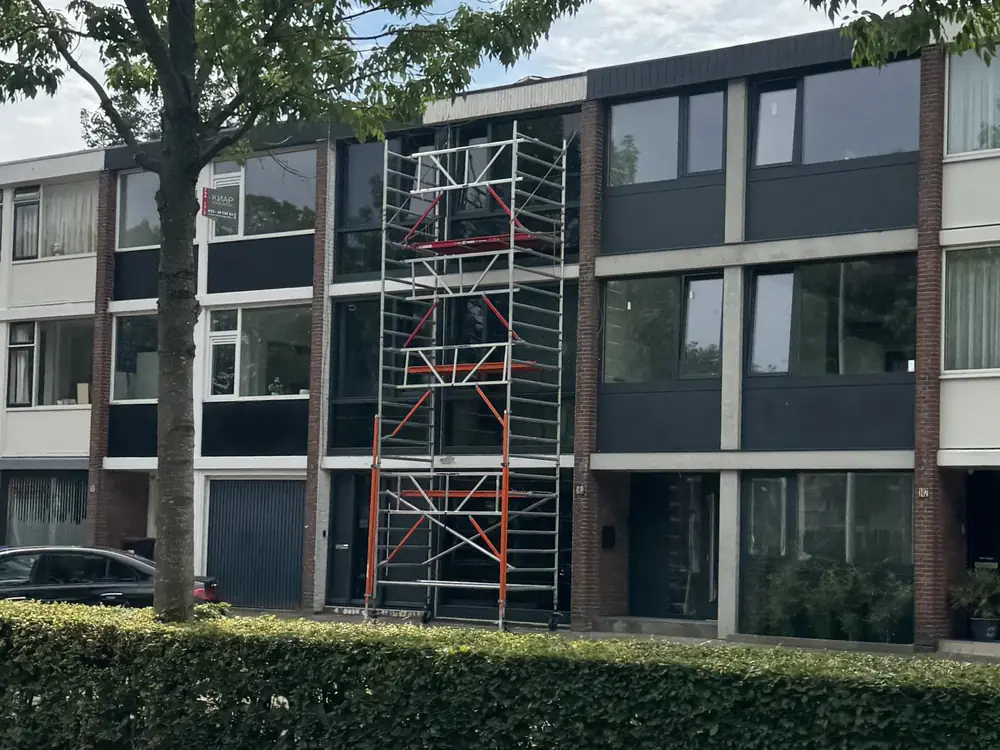
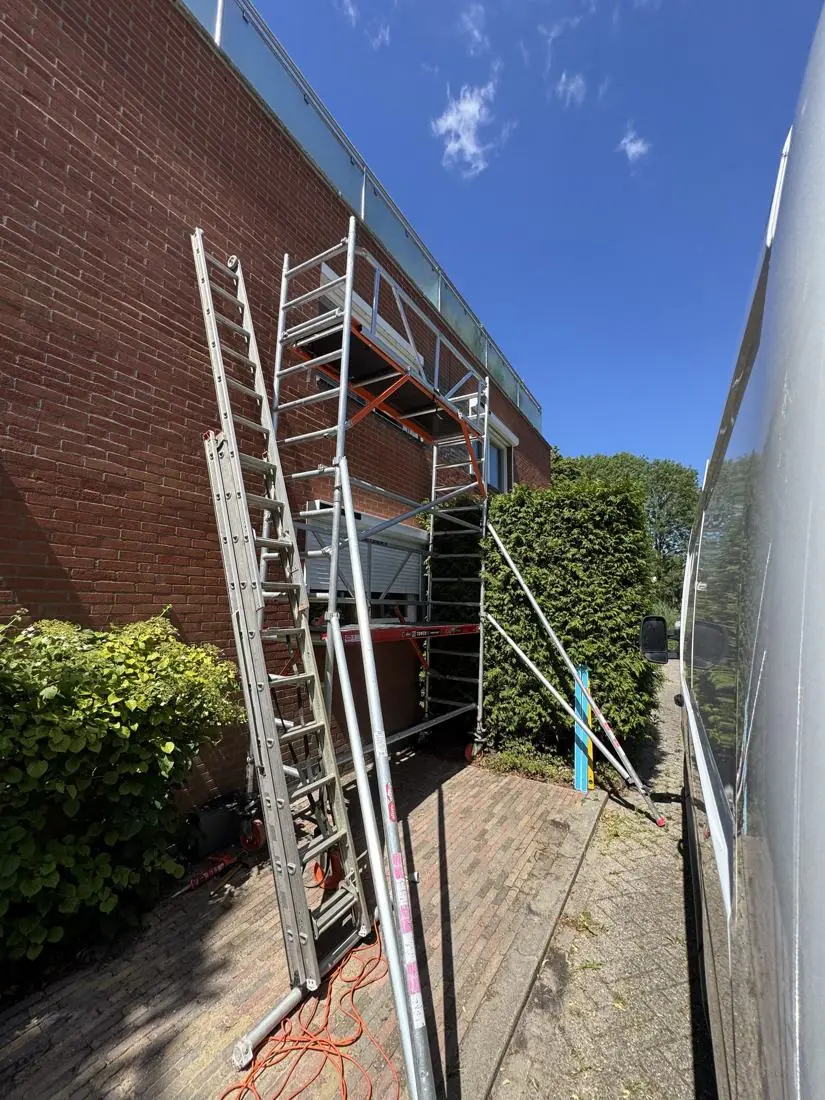
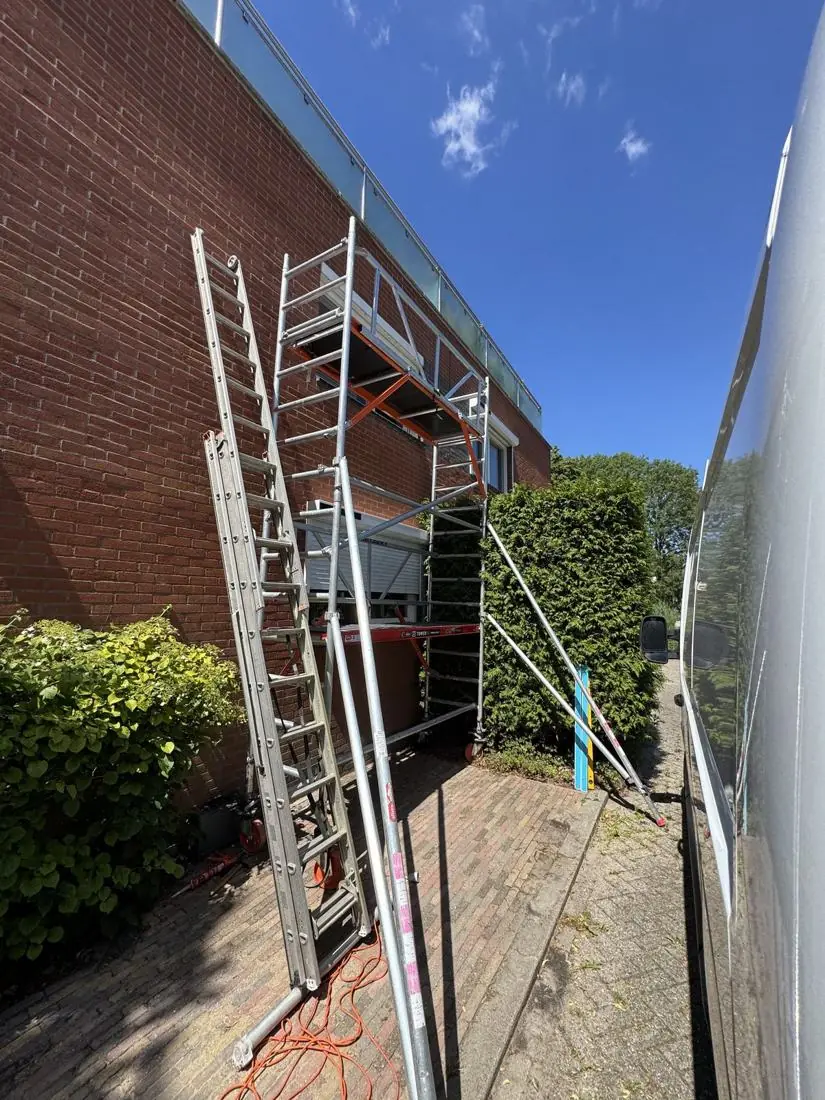
Narrow 75 cm tower standing against a modern elevation, the slim set-up you hire for a camera bracket

The ceiling of this model is that it carries one person. If two of you want to be up there looking at the picture together, or a drill, a reel and a coil of cable have to come along, it is better to hire a mobile scaffold of the wide sort, with its platform of 245 cm. For one camera with a bracket that is overkill, though along a row of units the extra floor earns its keep. The two sit side by side in this comparison of the models.
Which working height to hire for a camera under the gutter

On this job you measure to the bracket and not to the gutter. A camera that has to give an overview usually hangs just under the roof edge of a single storey house, or on the corner of a two storey house at first floor level. If that puts you at four to five metres, you hire a working height of 4.2 to 5.2 metres. The page about a working height of 5 metres shows which build belongs with that figure.

That working height is not the height of your platform. You stand on a floor roughly two metres below the highest point you can still reach and handle, and those last two metres are your own arms and shoulders. At 5.2 metres of working height the floor you stand on sits at about 3.2 metres. Measure from the ground under the wheels rather than from the doorstep, because if the driveway lies lower than the terrace your distance to the camera grows.

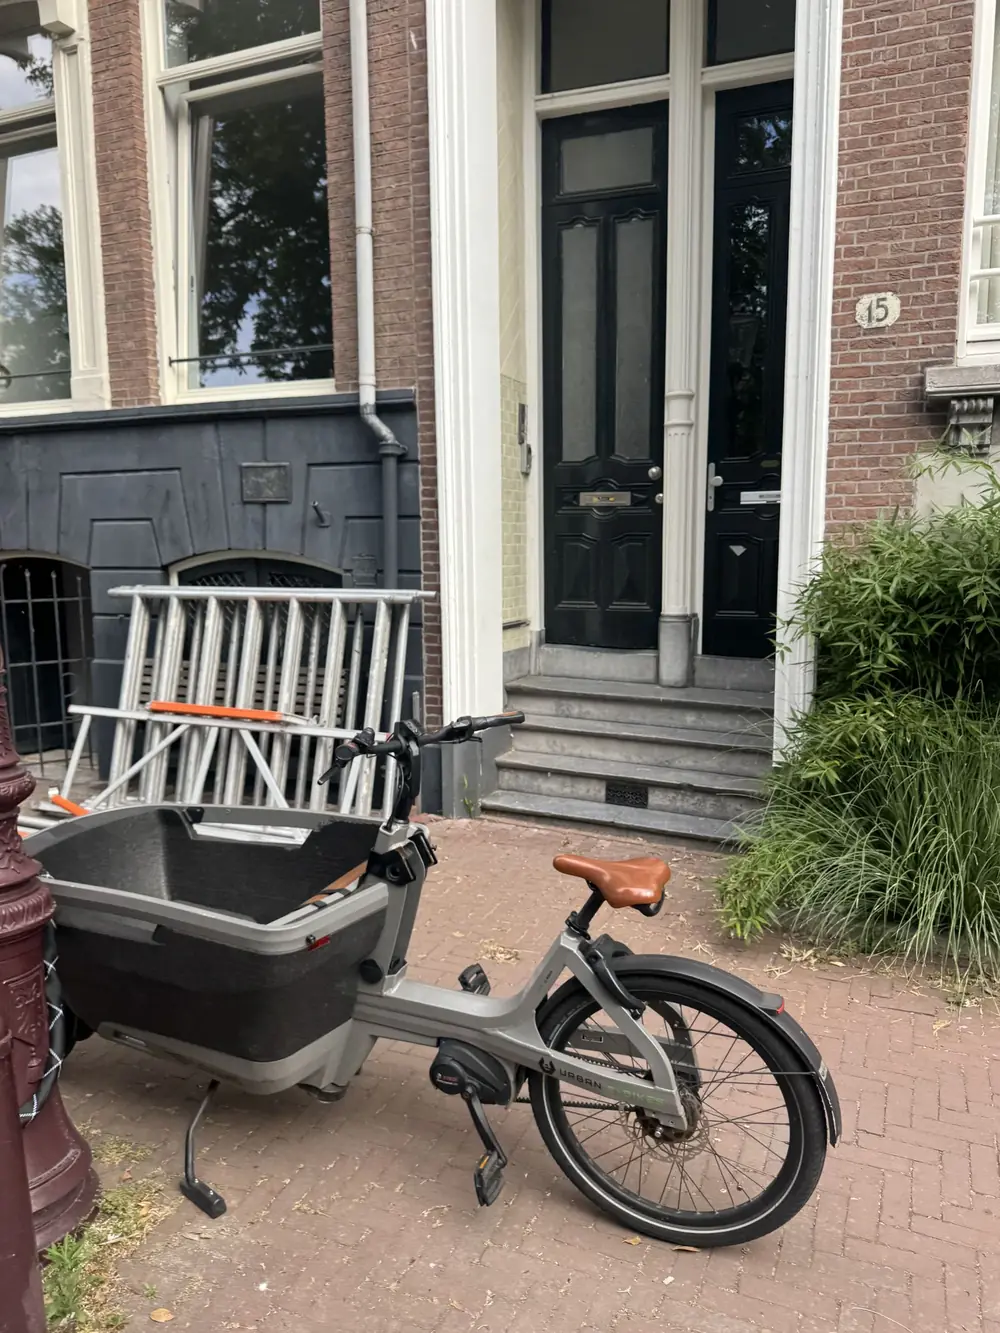
Scaffold parts against a facade on the pavement, delivered at street level well below the point a camera gets fixed

Hiring too tight costs you more than half a metre on camera work. Go too low and you end up fiddling overhead at a bracket that has to come right within tenths of a degree, which does not work. You can no longer hold your phone squarely in front of you either. So pick the height that puts the camera at eye level or just below. If the mounting point sits above five metres, look at a bracket on the second floor and hire a taller build.

Hiring a MiTower and setting it up outside the camera view

Do not park the tower squarely under the mounting point but half a metre to one side. Stand directly beneath it and you are looking at the underside of the housing with no idea which way the lens points. From the side you sight along the axis of the picture and can aim the camera while you hold it. There is a bonus too: the build is then not standing in the middle of the frame, so the person below sees on the phone what the camera will really record.

The four wheels want a level surface that will not sink, with enough slack around them to swing the stabilisers out. Block paving, slabs or tarmac are fine, a planting bed or loose gravel is not. Cameras like to hang above a driveway or a back door, and that is where the bins and the downpipe are. Clear that strip before the parts arrive, because shifting a built tower halfway through takes longer than tidying up now. A sloping path is covered in this guide to stabilising a tower.

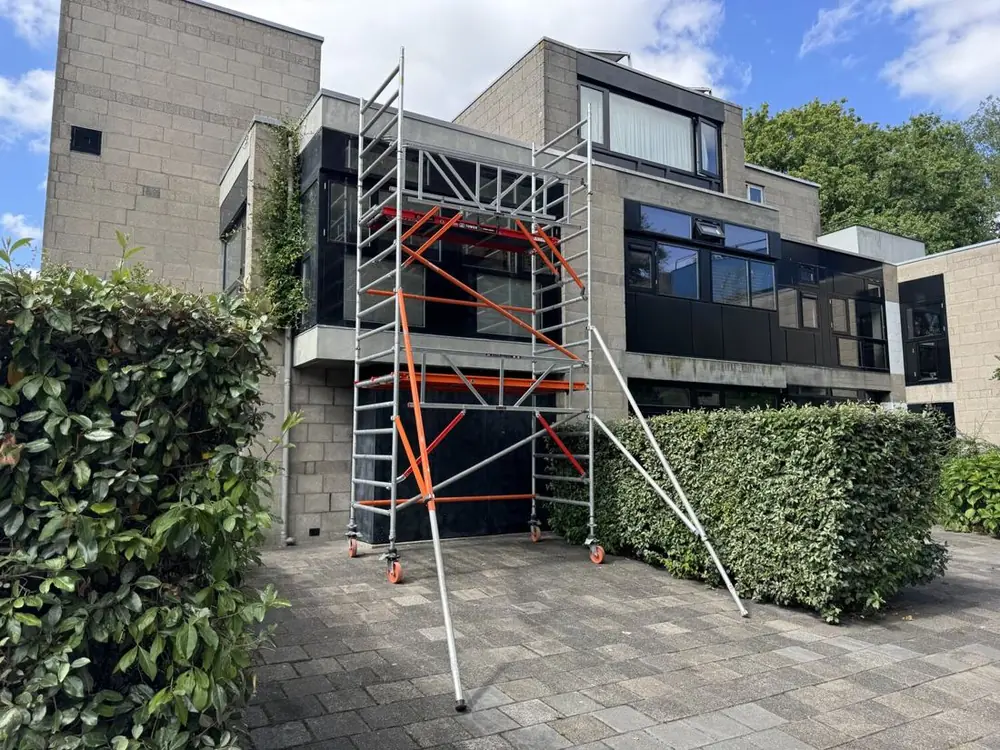
Stabilisers swung out at the foot of a tower, the clear space you need beside the camera mounting point

When you choose the standing spot, think about where the cable comes from as well. If it runs through the crawl space to the consumer unit, you want the scaffold on the side of the gland so you are not dragging half a reel across the paving. Have a look at where the camera will see over the boundary, too. It saves an awkward conversation later if the neighbours can watch the picture while you set it, and that conversation is easier while the set-up is still standing.

How many days to hire a scaffold for installing a camera

Hanging the thing takes an hour: drill the holes, fix the bracket, land the cable, clip the camera on. The aiming takes the rest. You set the angle, walk the sight line below, look at the screen, and climb again to turn it a few degrees. That repeats itself two or three times, and with a camera that also has to work in the dark you wait for dusk on top of that. Two hire days is the honest minimum for a job that looks like a morning.

Add the time the tower itself asks for. Building up to a shade under five metres costs you half an hour to an hour, taking it down slightly less, and in those hours you touch nothing on the camera. Hang more than one, front and back for instance, and each extra unit brings a move with it, so the third hire day arrives on its own. Better to book three days from the start than to face collection with a half aimed picture.

Tower standing along a side elevation, left up through the hire days until the camera is aimed properly

Booking generously costs little here. The full rate applies to the opening 24 hours alone, and each further day you tack on behind it carries 95 per cent off. An extra day to test in peace is therefore cheaper than a second booking once the picture turns out to be wrong. So put your end date on the day after your last test evening, not on the evening itself. What a longer period does to your booking is explained in this piece on daily and weekly hire.

Which mobile scaffold suits installing a camera?

Kamersteiger RS44
  • Working height up to 4 metres
  • Compact and narrow
  • Great for indoor and small jobs
View and calculate →
Smalle rolsteiger RS51
  • Working height up to 14.2 metres
  • Narrow (75 cm)
  • Ideal for narrow passages
View and calculate →
Brede rolsteiger RS52
  • Working height up to 14.2 metres
  • Wide platform (135 cm)
  • Extra stability and workspace
View and calculate →
Most chosen
1-persoons steiger MiTower
  • Working height up to 6.2 metres
  • Very compact
  • Quick and easy to assemble
View and calculate →

Installing, aiming and testing the camera from one scaffold platform

From a single set-up you reach the mounting point and roughly half a metre either side of it. That sounds like nothing, but for this job it is plenty: the bracket, the gland and usually the trunking as well sit inside that patch. What you do have to plan is the order. Drill first, hang the bracket, pull the cable through, and only then clip the camera on, so you are not drilling with a lens in your hand and dust settling on the dome.

Take everything you need above with you in one climb. Installing a camera nearly always trips over the forgotten item: the right plugs, a second drill bit, a ferrule, tape, or the phone you check the picture on. Hang a tool bag on the guard rail and run through the list before you step on, because every missing screw is a trip down and back up. With one person at a time on the platform there is nobody up there to pass you anything either.

Ladder built inside a tower between the guard rails, the climb you repeat while you set the camera angle

Aiming is a two person task, but not with both of you on the tower. You stand up top with a hand on the camera, the other stands below with the picture in front of them and says what needs to happen. That way you do in minutes what otherwise costs three climbs. Working alone, open the app on your own phone and hold it beside the lens. If you are also fitting an outside light on the same wall, do it from this set-up.

Hiring a MiTower with delivery the day before you mount

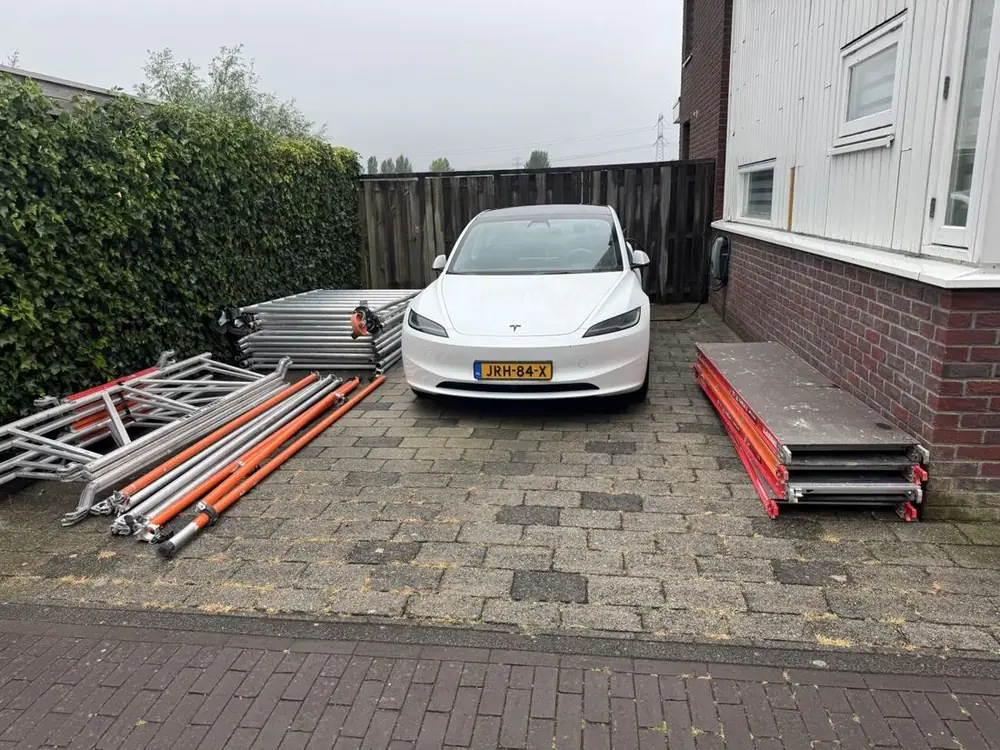
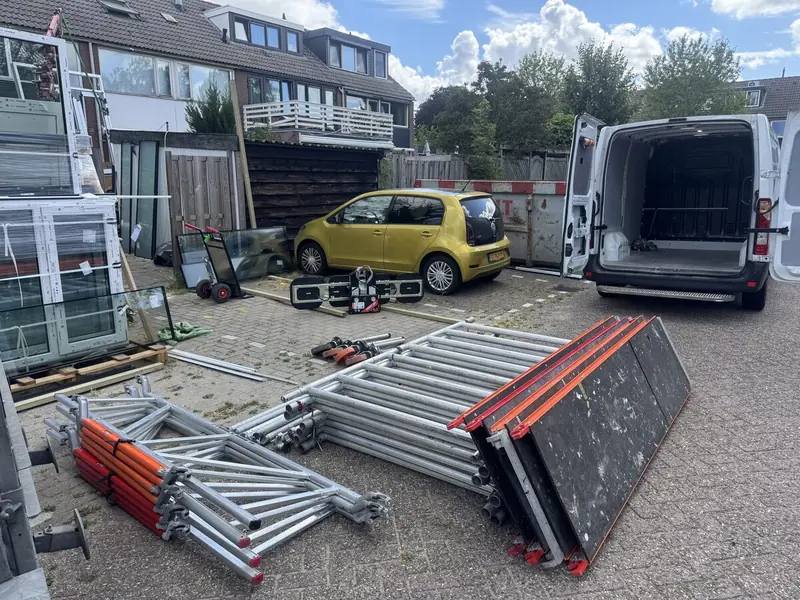
What turns up is not a finished tower but a counted, complete set of loose parts: uprights, braces, a platform and the stabilisers. On this job that takes a moment to get used to, because for one small housing there will be a fair stack of aluminium next to the driveway. Pick a spot in advance where that stack lies dry and blocks nobody. Place your order on a working day before 15:00 and the van is out the next working day, so a failed camera gets replaced inside two days.

Both dates, the drop off and the pick up, you enter yourself, and on this job you want the parts here a day ahead of the mounting. The build is then standing and you can drill first thing the following morning. Putting it up is your part: the manual plus the instruction video take you step by step past frames, braces and stabilisers, and it costs half an hour to an hour. Do not start once the light is going. There is more in the step by step on building a tower.

Scaffold parts dropped off on site, the counted set that arrives a day before you fit the camera

Collection is ours again, on the date you gave us. Your part is the dismantling and stacking of every part in the same place the van dropped them, so the driver can get at them with a sack truck. Count the parts back as you strike the tower; a single brace left in the grass costs you more time later than that counting does. The fixed amounts for bringing and fetching vary by province and you see them beforehand under the delivery rates.

Working safely on the MiTower while installing cameras

The platform is allowed 200 kg per square metre, the load class 3 that EN 1004 grants a build of this type. With a camera, a cordless drill and a tool bag you are nowhere near it. The real limit lies elsewhere: this model is made for one person, so somebody climbing up for a quick look at the picture does not belong there. Let whoever judges the image stand on the ground. The standard itself is explained in this article on the scaffold norm.

Even on an hour long job the basics hold. Brake the wheels before you step on, never wheel the build along while anyone or any tool is on it, and come down as soon as the wind gets up. Electrics come on top of that here: switch the circuit off before you land a supply cable, and do not work on a connection at four metres with wet hands. A voltage tester weighs nothing, fits in a breast pocket and takes the guesswork out of that check.

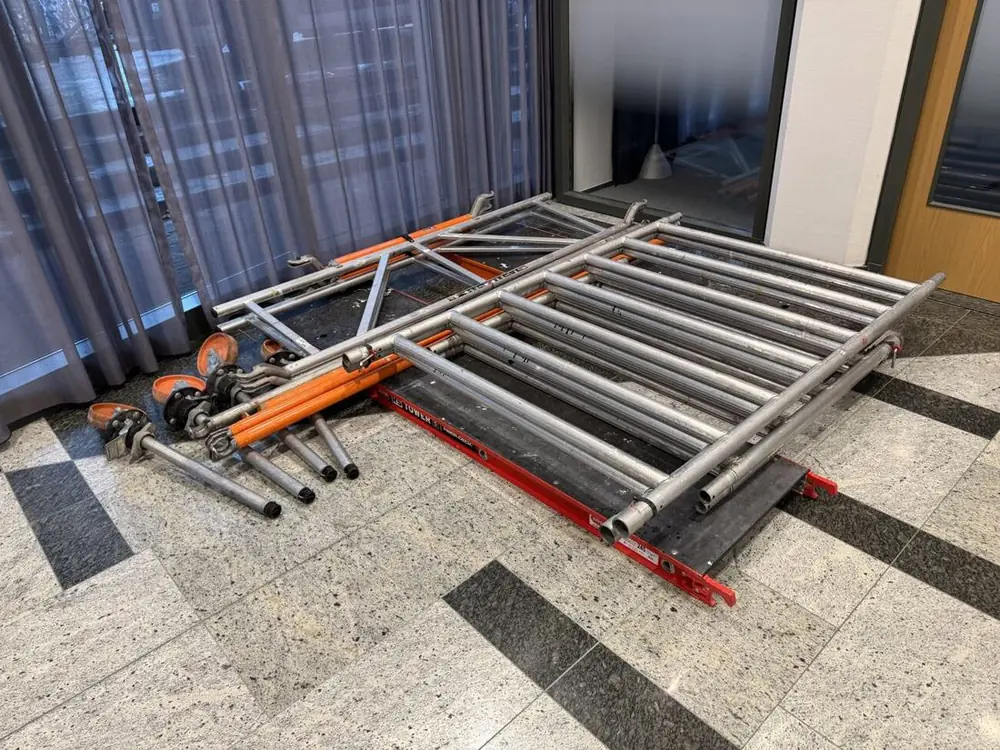
Inspected scaffold parts ready to go out on hire, the set you work from at four metres on a camera

The risk that belongs to this job is small and irritating at once: dropped tools. You are handling little screws, a drill bit and a lens, and you are often above a path that people use. Leave nothing loose on the guard rail, use a bag that stays shut, and cordon off the zone below if children are playing or the route to the front door runs underneath. The rest of the rules are in the guidance on working at height.

In 5 steps

How hiring a mobile scaffold works

1
Choose working height

Pick the height that suits your job.

2
Book online

Sorted in 60 seconds, price shown instantly.

3
We deliver

At the agreed spot the next working day.

4
Assemble safely

Assembled by you, with a manual.

5
We collect

One call and we collect the scaffold.

Good to know

Practical tips for installing a camera

1

Hold the camera where it will hang and take a test view on your phone before you drill. Shifting the bracket half a metre now is free, moving it after the holes are in is not.

2

Mark the far edge of the area you want covered with tape on the paving. You can see that line from the platform, so you can judge the field of view without asking anyone to walk about.

3

Leave the hood or sun shield loose until after the first test. Nearly every camera still needs turning a few degrees, and with a loose hood that correction takes ten seconds up top.

4

Coil an extra metre of cable in a loop behind the bracket. Should you want to shift the housing slightly later, you will not be pulling in new cable and one trip up covers it.

5

Write down the settings you pick for sensitivity, night mode and recording length. Standing here again in a month, you will not have to guess what you changed, and that saves a whole test round.

6

Plan your hire days around an evening when you are at home. Night mode can only be judged in real darkness, and you do not want to miss that because the van comes in the morning.

Frequently asked questions

Frequently asked questions about installing a camera

Which scaffold should I hire to install a camera?+

If the bracket sits at four or five metres, the MiTower is the model you hire: the slim 75 cm version for one user. That width fits the places cameras actually hang: on a corner, above a door, in an alley beside the garage. If you are working through a series of cameras around a business unit, a wider tower with a longer platform is easier. Measure the narrowest gap on your route before you book.

How does hiring a scaffold work for a job this small?+

Booking happens online. You choose the model and the working height, pin down when the counted set should arrive and when it may go again, and pay a fixed price including VAT. After that it is your turn: build it, hang the camera, aim it and test. On the last day of the hire everything stands dismantled and we take the tower away again. The hard part of the planning is never the booking, it is finding the moment you can test.

How many days do I need to hire for mounting and aiming a camera?+

Two days is the minimum, three if you are hanging several cameras. The mounting itself is an hour, but the aiming happens in rounds: look, turn, look again. If the camera also has to give a picture at night, an evening joins the list, and that evening rarely falls on the day you mounted it. Build that time into the period you hire the scaffold for, rather than hoping the frame lands right first time.

What is the rental price for a scaffold when I am fitting one camera?+

The amount hangs on two dials: the model of tower you hire and the height, with bringing and fetching on top, which carries a fixed rate per province including VAT. The current rental price is listed on the prices page. For a job like this the shape of the tariff matters more than the figure. The first day carries the weight and every day behind it barely registers, so one roomy booking beats two short ones.

Which working height should I hire for a camera below the roof edge?+

Measure from the ground under the wheels up to the bracket, not up to the gutter above it. For a camera just under the roof edge of a single storey house you hire 4.2 to 5.2 metres, which puts your platform a little over three metres. If the point sits higher, check the page with working heights for the matching tower. If in doubt, take the roomier build, because half a metre short only shows itself once you are up.

Can I have the scaffold delivered when I hire it, or do I collect it?+

Both work. With delivery the parts arrive on the date you gave and we take them back after your last test evening; bringing and fetching together cost a fixed amount that differs per province. Prefer to drive yourself, and the set stands ready for you free of charge by appointment at Zeeburgerpad 89 in Amsterdam, provided your car or trailer can take the long parts. For one camera most people hire with delivery anyway.

Is putting the scaffold up included in the hire?+

No, that stays your side of the job. We bring the parts to your address as one complete set, but standing it up, moving it and taking it down belong to your work. At the height a camera calls for, that is half an hour to an hour of your time. Facade scaffolds are not in the fleet, nor are system scaffolds or cherry pickers, so at a mounting point of four or five metres this model is the sensible choice.

Can I hire for longer if the picture is still wrong after the first evening?+

Yes. Tell us in good time and we move the collection date, unless the tower is already promised to the next customer. On camera work that happens more often than you would think, because only in full darkness do you see whether night mode covers the area you had in mind. To stay ahead of it, book the extra day straight away; handing back early is allowed, so a generous booking costs you nothing.

How much clear space does the hired scaffold need on a driveway?+

Allow for the width of the build plus whatever the stabilisers reach out on each side, and keep a path clear so you can walk around it yourself. A level strip of two by three metres is usually enough. If there are bins, bikes or a water butt under the mounting point, move them before the tower is dropped off. Remember the stack of parts has to lie somewhere too, and that heap is bigger than this model suggests.

Can I carry on working if it rains during my hire period?+

The tower may stay standing, but the work waits. Fixing a bracket and feeding a cable through in the rain puts moisture in the housing, and a wet platform is needlessly slippery underfoot. More to the point, rain on the lens hides whether the field of view is right, so you test nothing useful anyway. Because you decide yourself how long you keep the scaffold, a shift like that usually costs one more hire day.

How quickly is my deposit back once the hire ends?+

You settle a deposit when you hire the tower, and it is back in your account within one working day of the complete set being counted in. Two things count double on this job: return every part you were given, and wipe drill dust or sealant off the platforms. Small items disappear easily in the grass beside a driveway, so count out loud as you dismantle. This article on getting the deposit back covers the rest.

Can I mount and aim several cameras in one hire period?+

Yes, and that is usually the smartest order. While the scaffold is on your land you move it to the next wall in ten minutes, so hang all the cameras within the same hire period and set them in one round afterwards. Allow half a day per extra camera, including the move and swinging the stabilisers out again. Two separate bookings cost you two first days at the full rate and two journeys.

Hire a mobile scaffold for installing a camera today?

Calculate your rental price now or ask for free advice.

Rolsteiger van SteigerTaxi geleverd op locatie
Book it online

Your scaffold sorted in 2 minutes.

Choose your scaffold and working height, see the price instantly and book online.