
Knowledge base · reading time 12 min
Which scaffold for installing a dormer window?
Installing a dormer is not a job where you go up once and come straight back down. You work for hours at the same height, with panels, frames, insulation and tools within reach, and with two people at a time. That calls for a workplace that stands firm, offers room and comes close enough to the roof surface without any stretching. Below is how to establish the working height, which width to choose and what to watch for in the set-up.
- Installing a dormer? Set the right working height, choose narrow or wide, and read how to get panels, frames and tools up safely.
- Usually six to nine metres working height, depending on the house.
- No.
- Then the narrow RS51 at 75 centimetres wide is often the only one that fits.
What installing a dormer asks of your workplace
Installing or replacing a dormer is not one action but a sequence: stripping tiles, cutting the opening, setting the frame, fitting the window, cladding the cheeks and finishing the lead and the roof. Each step calls for different tools and different material, and you do not want to climb down for every part. A platform where your kit can sit is therefore not a luxury but the core of the job.
On top of that you work with two people. A window frame or a prefabricated element is rarely lifted into place alone. Two people side by side plus material means you need a platform long and wide enough to move past each other without anyone stepping back into the guardrail. A platform 245 centimetres long gives that room, even with material on it.
The third point is duration. A ladder may be enough for a quick look, but not for a full day of working with both hands. Where the line runs between the two is set out in the guide on ladder or mobile scaffold. For dormer work that choice falls on a scaffold with a full platform every time. That applies all the more when you already know the work will run over several days.
Key facts
| Feature | Value |
|---|---|
| Core answer | Installation needs a stable work floor at gutter height, usually 6.2 to 8.2 m |
| Working height | Platform height + 2 metres |
| Available working heights | 4.2 to 14.2 metres |
| Load class | Class 3: 200 kg per m² |
| Delivery | Ordered before 3 pm, delivered next working day |
Establishing the working height for a dormer
A dormer usually sits at six to nine metres working height, depending on the house and its position in the roof. Measure from the ground to the base of the dormer, so to the point where the work starts, and not to the ridge. The sum is then simple: working height is platform height plus two metres, because an adult reaches roughly two metres above the platform.
On dormer work that rule of thumb behaves slightly differently than on facade work. You are not reaching upwards but forwards and sometimes slightly down, towards the roof surface. A platform level with the base of the dormer or just below it therefore often works better than one set too high. Too high means stooping, and that is not sustainable for a day.
The sizes per height are on the working height page. For the most common situations you land on 8 metres working height or 9 metres working height. If you are unsure which size suits your roof, the guide on which scaffold for a dormer takes it further. If in doubt, take half a size more room, because standing too low costs you comfort all day.
| Working height | Platform height | Typical situation | Floor page |
|---|---|---|---|
| 6 metres | 4 metres | Dormer on a low house or above an extension | First floor |
| 7 metres | 5 metres | Dormer on a bungalow or a house with a low gutter | First floor |
| 8 metres | 6 metres | Dormer on an average terraced house | Second floor |
| 9 metres | 7 metres | Dormer on a house with a high gutter or extra storey | Second floor |
Narrow or wide: why wide usually wins on dormer work
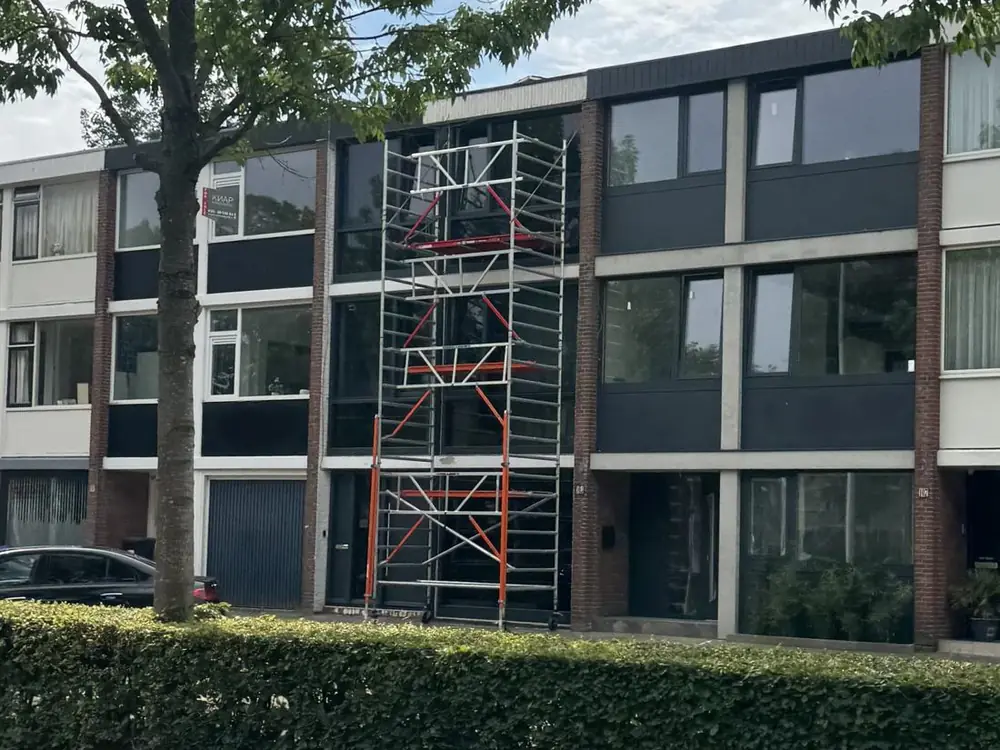
The narrow RS51 is 75 centimetres wide and the wide RS52 measures 135 centimetres; both carry a platform 245 centimetres long. When installing a dormer that extra width is usually decisive. You can set a panel down, put tools to one side and stand alongside a second person without getting in each other's way. It also gives you somewhere to set a level or a saw down without it ending up underfoot.
The narrow version stays useful where space does not allow anything else. Behind a terraced house with a narrow garden path, between a shed and the house or along a boundary fence, 75 centimetres is sometimes the only thing that fits. You give up workspace but you stand in the right place. Both models are listed under mobile scaffold hire.
Make the choice with a tape measure in hand. Measure the clear space between the facade and the first obstacle and allow for the stabilisers, which extend outwards. If room is left over, choose wide. The comparison of both models is set out in the guide on which scaffold for a dormer. Include the passage the frames have to travel through in that measurement, because it is often narrower than the set-up spot itself.
The ground at the front or back of the house
A dormer at the front usually means setting up on a pavement, a drive or a front garden. At the back you more often stand on paving, grass or a terrace. Both call for base plates, because the castors of a scaffold put a lot of weight on a small area and will sink into sand or soft garden soil without them.
Level the base frame before building any higher and check it again halfway up. At eight metres a centimetre of lean at the bottom is clearly noticeable. How to handle ground that is not level is covered in the guide on a mobile scaffold on uneven ground. After building, check that all four castors genuinely bear weight and that none of them hangs free.
- Loose or sunken paving slabs directly under a castor
- A terrace sloping away towards the garden or a drain
- Lawn or borders that turn soft after rain
- A drain, gully or gravel strip along the rear wall
- An extension, conservatory or veranda between the wall and your set-up spot
- Room for the stabilisers, which extend outwards
Positioning against the roof edge and roof surface
The awkward part of a dormer is that your work point does not sit directly above your set-up spot. The gutter and roof edge project forwards, while underneath you want the platform close to the wall. The result is that you have to bridge the last stretch to the roof surface without reaching far. How far that overhang projects is easiest to measure with a batten held out from the wall.
So place the scaffold as close to the wall as possible, with the stabilisers positioned where they do not foul an extension or a window sill. If the overhang leaves you short, there is a set way to deal with it rather than improvising from the platform edge. Plan that solution before you start building, not once you are already at height. Agree with your colleague who does and does not step onto the roof surface.
Working from the roof surface itself is a separate matter. A pitched roof is not a working floor and calls for its own measures; what that involves is covered in the guide on a mobile scaffold on a pitched roof. When installing a dormer you work from the scaffold towards the roof in practice, not the other way round.
Getting panels, frames and tools up there
A dormer consists of parts that are large and awkward but not extremely heavy: side cheeks, a front panel, a window frame, insulation and the finishing. Two people can get those up, but you do need somewhere to lay them down without anything projecting over the edge. A platform 245 centimetres long provides that room. Allow for the hatch in the platform when you lay things out, because you have to keep working around it.
Put heavy material in the middle of the platform rather than against one edge, and spread it along the length. Toe boards hold back small tools, but a panel leaning against the guardrail can still slide outwards. Lay that kind of part flat or secure it. Keep small screws and sealant in a bucket or box, so nothing can roll past the toe board.
What you can take up is covered in the guide on load and weight on a mobile scaffold. The equipment is Altrex, built to EN 1004 in load class 3, which works out at 200 kilos per square metre of platform. Two people with material stay below that in practice, provided the weight is spread. Put tools you are not using on the side you do not walk along.
Stabilisers and anchoring at dormer height
At six to nine metres working height a scaffold is no longer something you simply stand up. The assembly instructions state from which height stabilisers are required and when anchoring to the wall is needed as well. Follow those instructions even when the scaffold feels solid; the point is what happens when the wind gets up while you are working.
Anchoring means the scaffold is tied to fixed points on the wall. On a house that can often be done to a window frame rather than into the brickwork, which avoids damage. Plan the points before you start building, because anchoring afterwards means taking part of the build back down. Note where the points go on a sketch of the wall, so you also know where to make good when dismantling.
The full approach is covered in the guide on stabilising and anchoring. Note too that the stabilisers take up ground space: a bike shed, a hedge or a water butt in the wrong place sometimes forces a different position or a narrower model. Clear those spots beforehand, because a stabiliser standing at an angle does not do its job.
Working on the platform with two people
Dormer work is rarely done alone, and that changes how you arrange the scaffold. Agree who stands where and keep a walking route clear along the length of the platform. Anything lying on the deck while you manoeuvre a panel is a trip hazard at seven metres. Put tools away as soon as you stop using them rather than leaving them on the deck. The full assembly sequence is set out in the guide on assembling a mobile scaffold.
Assembly is faster with two as well. You build the scaffold yourself using the supplied manual and the instruction video, because Steigertaxi does not deliver assembled and does not build it for you. The fixed sequence is: level the base frame, lock the castors, fit frames, add braces, place the platform with its hatch, then guardrails and toe boards. Follow it in that order every time, however familiar it becomes.
Move the scaffold only with an empty platform and nobody on board. On a dormer you usually shift once or twice, for instance to reach the other cheek. Level it again afterwards and check that every castor is back on the brake. If the dormer is wider than the platform, build that move into your working sequence from the start.
- Agree in advance who works on which side of the platform
- Keep the walking route clear along the length of the platform
- Put heavy material in the middle and spread it along the length
- Move only with an empty platform and nobody on board
- Level again with the adjustable feet after every move
- Check that all four castors are braked before you climb
Planning: lead time, hire days and the weather
Installing a dormer almost always runs over several days, if only because the roof has to be closed in between and the finishing takes time. So do not plan tight: leave the scaffold standing until the job is completely done, including painting and clearing up. The first hire day costs the full day rate and every following day only 5 percent of it, so extra days weigh lightly.
Weather is a bigger factor on roof work than on facade work. An open roof and rain do not mix, and in strong wind you stop working at height. Plan a spare day so you are not left with a half-open roof and no scaffold. If you need one quickly, look at urgent scaffold hire. Bear in mind as well that an open roof has to stay covered overnight.
Order before 15:00 and the scaffold is delivered the next working day, anywhere in the Netherlands. The amounts per region are listed under delivery costs, and how the hire price is built up is set out under the cost of a mobile scaffold. In Amsterdam you can also collect by appointment at Zeeburgerpad 89. Tell us when ordering where the driver can unload, so nobody has to hunt for a spot on the day.
Finishing and painting from the same scaffold
The scaffold you use for the installation is exactly the one you need afterwards for the finishing. Painting the cheeks, running sealant along the frame and checking the lead all happen at the same height. So leave it standing until that work is done rather than having it delivered twice. The anchoring stays in place too, which saves you setting everything up again for the last stage.
For the painting itself the application page on painting a dormer is the starting point, and everything about the installation is gathered on installing a dormer. Bear in mind that paint needs drying time between coats; those are days when the scaffold stands but little happens. Build those days into your hire period so you do not need equipment again for the final coat.
Anyone who also wants to tackle the gutter or the fascia boards is best doing so within the same hire period. You are up there anyway, the build is already levelled and anchored, and moving along the wall takes a few minutes per position. Cleaning the gutter or replacing a fascia board then becomes a matter of shifting along. For that work, look at painting fascia boards.
Dismantling, returning and getting the deposit back
Dismantling runs in reverse order: toe boards and guardrails first, then the platform, then braces and frames, and the base frame last. Hand loose parts down rather than dropping them, even a light brace. Stack everything in one place where the driver can load it. Keep the parts out of the walking route while you work down, so nobody trips over a frame.
Count the parts against the list you were given as you dismantle. A single toe board left in the garden holds up the settlement of your deposit. The practical side is covered in the guide on dismantling and returning a mobile scaffold. Store small parts such as toe boards and hatch panels separately during the job, because those are the ones that go missing fastest.
You get the deposit back in full within one working day after return, provided the scaffold is complete and undamaged. For the RS51 and RS52 that is 500 euro on delivery; the amounts for the other models and for collection are on the page about the deposit. If you are unsure about the size or the set-up, send a photo on WhatsApp.
Frequently asked questions
How high does the scaffold need to be for a dormer?
Usually six to nine metres working height, depending on the house. Measure from the ground to the base of the dormer and subtract two metres for the platform height. On an average terraced house you often land around eight metres working height.
Can I install a dormer with just a ladder?
No. You work for hours with both hands on panels and frames, and that is not possible from rungs. A mobile scaffold gives a stable platform where material can lie beside you and where two people can work at the same time.
Which model do I choose if my garden path is narrow?
Then the narrow RS51 at 75 centimetres wide is often the only one that fits. Do allow for the stabilisers, which extend outwards. If there is more room, the wide RS52 at 135 centimetres gives more space for panels and tools.
How do I get past the projecting roof edge?
Set the scaffold as close to the wall as possible and allow for the gutter projecting forwards. There is a set way to bridge that last stretch without reaching. Ask for advice with a photo of the situation if you are unsure.
How many days should I hire the scaffold for?
Count on several days, including finishing and drying time for paint. Leave it standing until the job is done, because the first day costs the full rate and every following day only 5 percent of it. A spare day for bad weather is sensible.
Do I have to anchor the scaffold to the wall?
From the height stated in the assembly instructions, yes. At dormer height you usually go above it. On a house, anchoring can often be done to a window frame rather than into the brickwork, which avoids damage to the facade.
Can two people work on the platform?
Yes, and on a dormer that is the norm. The platform is rated in load class 3 and takes 200 kilos per square metre. Spread the weight of people and material along the length and keep the walking route clear.